Great science activities for preschoolers introduce kids to the joy of discovery and plant the seed in their minds that exploring science is fun. They also help kids develop background knowledge (like the fact that salt melts ice or some liquids are denser than others) that makes future learning easier.
Most importantly, preschool science activities encourage kids to ask questions, experiment, and manipulate things to see what happens—all important developmental milestones for building Curiosity!
4 Fun Preschool Science Activities

1. Explore Liquids and Solids with Fluffy Slime
Are you looking for an easy fluffy slime recipe without Borax? Today from Tinker Labs we’re sharing how to make fluffy slime.
What You Need
- 1/2 cup of Elmer’s glue
- 3 cup of white shaving cream
- 1 tbl spoon of baking soda
- A few drops of food coloring, to your liking
What to Do
- Step 1: Add three cups of white shaving cream (not clear shaving cream) to a large mixing bowl. Don’t worry about exact amounts. This recipe is forgiving and a little more or less will be fine.
- Step 2: Add 1/2 cup Elmer’s School Glue to the mixing bowl
- Step 3: Add a teaspoon of baking soda to the mixing bowl.
- Step 4: Stir everything together with a spatula or large spoon.
- Step 5: Add a tablespoon of contact solution (15 ml) to the bowl. Stir it all together!
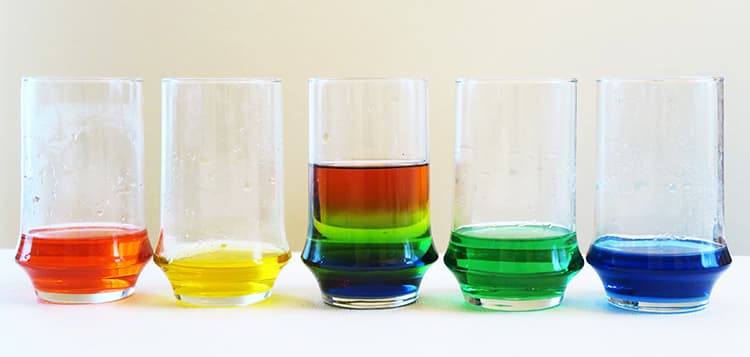
2. Make a Density Rainbow with Sugar and Water
Add a little color to your science time with this fun rainbow activity. Combining colors usually results in a messy brown, but if your colors are liquids with different densities, kids can layer them in a glass for a mesmerizing effect!
What You Need
- 5 drinking glasses
- Warm water
- Sugar
- Spoon
- Food coloring in four different colors
- Small turkey baster
What to Do
- Pour 1/4 cup of warm water each into four of the drinking glasses.
- Add sugar and food coloring to the water. Each color will have a different amount of sugar in it.
- Add 1 tablespoon of sugar and 2 drops of red food coloring to the first glass. Stir vigorously so the sugar dissolves completely, creating red water.
- Add 2 tablespoons of sugar and 2 drops of yellow food coloring to the second glass, then stir vigorously.
- Add 3 tablespoons of sugar and 2 drops of green food coloring to the third glass, then stir vigorously.
- Add 4 tablespoons of sugar and 2 drops of blue food coloring to the fourth glass, then stir vigorously.
NOTE: You must get the sugar to dissolve completely. If it doesn’t, the colors won’t separate well when you combine them in the final steps.
- Time to make the rainbow! Transfer roughly half of the blue water into the empty fifth glass using the turkey baster.
- Ask the kids what they think will happen when you add the green water on top of the blue. Then, using the baster again, transfer half the green water into the rainbow glass. Make sure to add it slowly. It should sit on top of the blue without mixing.
- Using the baster, add the yellow, then the red.
NOTE: If the experiment isn’t working, try heating up your colored water for 5 to 10 seconds in the microwave and stirring it again to help the sugar dissolve.
This activity works because the less dense color solutions (the ones with less sugar) can “float” on top of the denser solutions (the ones with more sugar), making a rainbow! You can use the remaining water to let the kids try some experiments—what happens if you add the blue water on top of the yellow or the yellow on top of the blue?
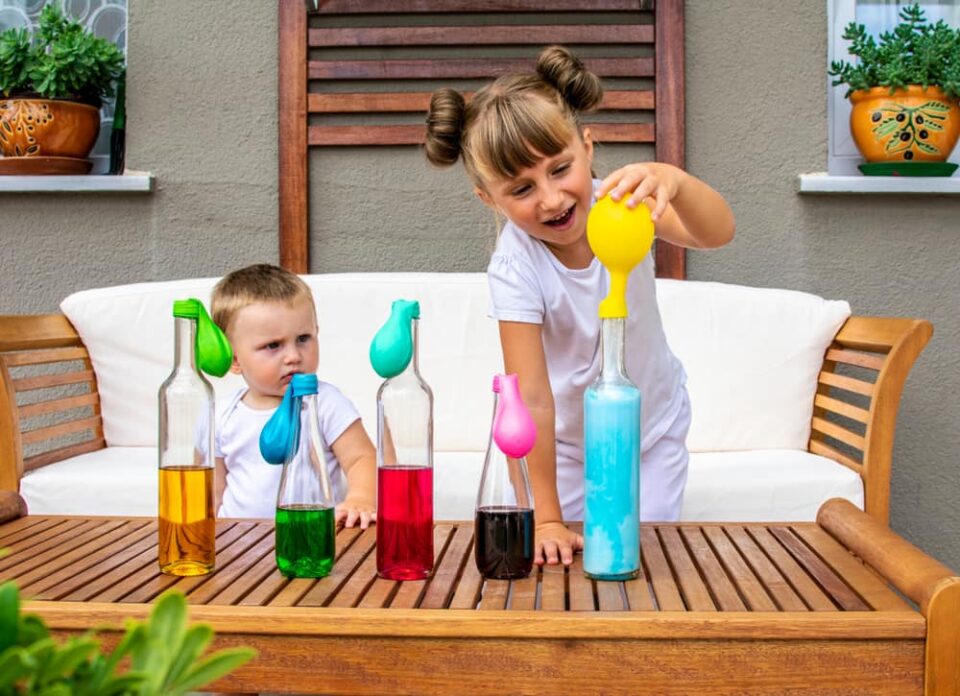
3. Inflate a Balloon with Baking Soda and Vinegar
Baking soda and vinegar activities are great for preschoolers because they use two safe, common ingredients to create a striking chemical reaction. We like this one because the inflating balloon shows kids how the reaction creates a gas (carbon dioxide) that’s otherwise impossible to see!
What You Need
- 1/3 cup baking soda
- 1 cup white vinegar
- 1 empty plastic water or soda bottle
- 1 uninflated balloon
- 1 funnel
What to Do
- Fill the uninflated balloon with baking soda using the funnel. If you don’t mind spilling a little, kids can help with this step while an adult holds the balloon and funnel.
- Pour the vinegar into the empty plastic bottle, then slide the mouth of the balloon over the top of the bottle.
- Check that the balloon is secure around the mouth of the bottle, with no room for air to escape. Then lift the balloon and let the baking soda fall into the vinegar below. Kids can help gently tap the balloon to get all the baking soda out if needed.
- Now for the fun part! The baking soda and vinegar will react, bubbling and fizzing as they create carbon dioxide gas. As the reaction goes on, the gas will fill the balloon, inflating it!
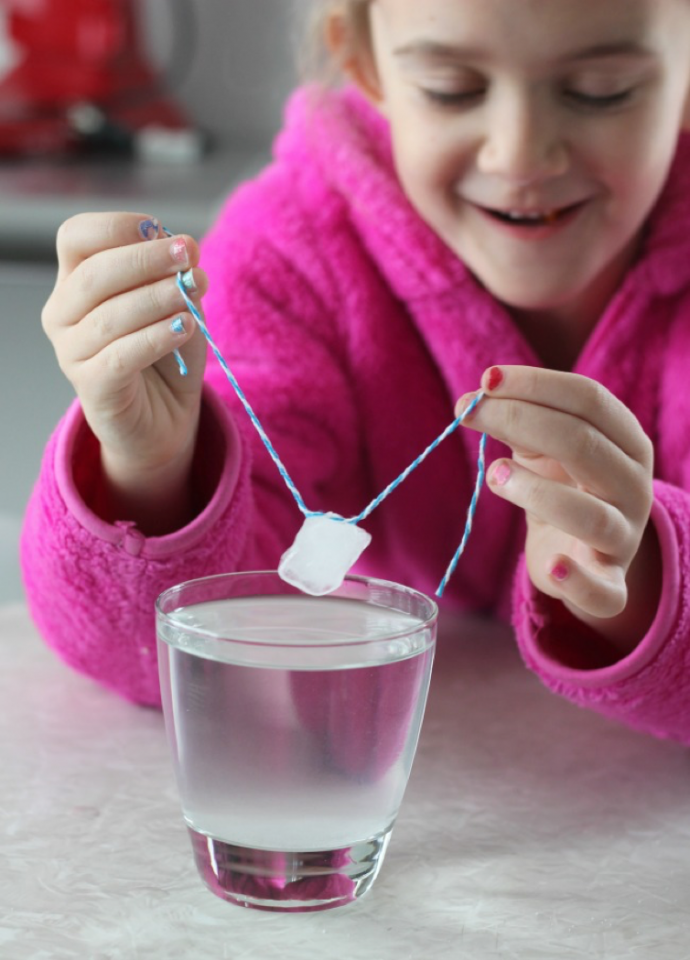
4. Use Ice and Salt to Make a Magic String
Can you pick up an ice cube using a string and a little bit of salt? If you know about melting points, the answer is yes—no tricky knots required! This experiment is fun because it’s surprising, and for kids in colder climates, it helps explain why people salt roads, sidewalks, and driveways in winter!
What You Need
- 1 glass
- Water
- 1 ice cube
- Salt
- Scissors
- String
What to Do
- Fill the glass almost to the top with water, leaving a little space so it doesn’t overflow when adding the salt and ice cube later.
- Gently place the ice cube into the water.
- Sprinkle the salt over the ice cube.
- Cut a piece of string so it’s long enough to fit over the cup without falling in, then lay the string over the ice cube.
- Wait 1 minute.
- Ask the kids to predict what will happen if you pick up the string.
- Lift the string up by the ends—it should lift the ice cube with it!
This bit of magic works because salt lowers the freezing point of water. Sprinkling it on the ice cube causes its top to briefly melt, then re-freeze around the string. If you have some extra time, ask the kids what else they might be able to do with this newfound knowledge. Maybe they’ll think of another experiment to try!